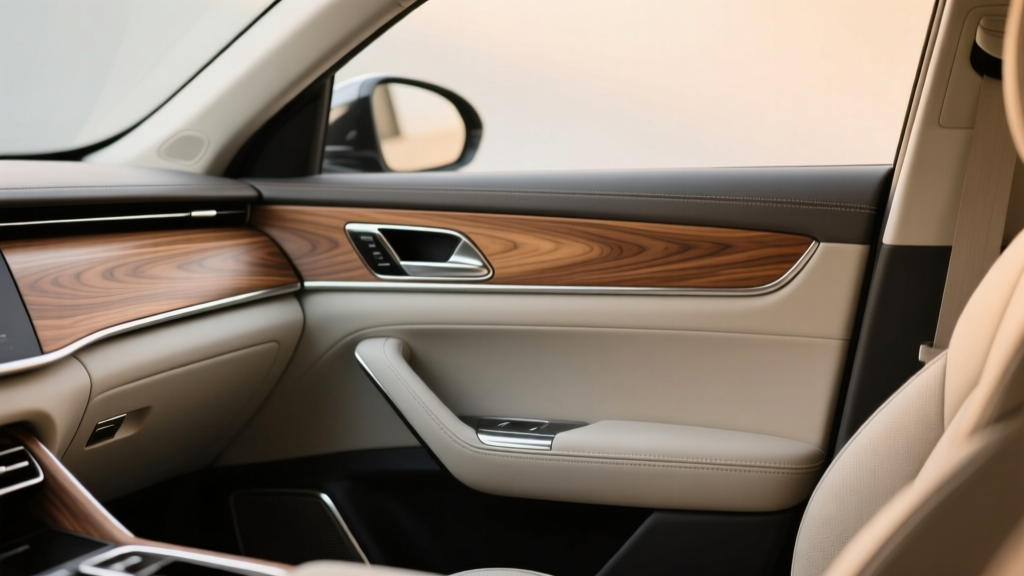
Wood Grain Accent Troubleshooting (2026)
Wood grain accents can transform a cabin from ?stock? to ?special? in an afternoon. Whether you?re installing real wood veneer overlays, polyurethane ?wood look? dash kits, hydro-dipped trim, or vinyl wraps, the visual payoff is huge?when everything fits, sticks, and matches the rest of the interior.
Part 1 typically covers the basics: surface prep, alignment, and initial application. This Part 2 is for what happens after the first attempt?when edges lift a week later, a panel creaks, the finish looks too glossy, or the color doesn?t match your interior lighting. These are the issues that separate a clean OEM-style result from a DIY job that constantly bugs you.
Use this guide as a practical checklist to diagnose the most common post-installation problems and fix them correctly. You?ll also find product recommendations, real-world examples, and the mistakes that cause 80% of repeat failures.
Quick Diagnosis: What Type of Wood Grain Accent Did You Install?
Before troubleshooting, identify what you?re working with. Fixes vary depending on the material and adhesive system.
- Pre-cut dash kit overlays (ABS/urethane) ? Often 3M tape-backed; rigid or semi-flexible pieces.
- Vinyl wrap (wood grain film) ? Heat-stretched; adhesive is pressure-activated and temperature-sensitive.
- Real wood veneer overlay ? May use contact adhesive or specialty automotive adhesives; sealed with clear coat.
- Hydro-dipped / painted trim ? Permanent coating; issues are usually finishing, prep, or reassembly-related.
Problem: Edges Lifting, Corners Peeling, or Pieces Slowly Detaching
This is the most common complaint with wood grain accent additions. Lifting usually starts at corners, around vents, or near high-touch zones like the shifter surround.
Likely Causes
- Surface contamination (silicone dressing, interior cleaner residue, skin oils)
- Low temperatures during install (adhesive never fully ?wets out?)
- Insufficient pressure or uneven pressure during application
- Too much tension in vinyl wrap at corners
- Weak tape (generic foam tape or old adhesive)
- Textured OEM plastics where tape can?t fully bond
Step-by-Step Fix: Rebonding Lifted Edges (Tape-Backed Overlays)
- Warm the cabin to around 70?85�F (21?29�C). If it?s cold outside, run the heater for 10?15 minutes.
- Lift the edge gently with a plastic trim tool. Don?t yank?especially on thin overlay pieces.
- Clean the bonding area using 70% isopropyl alcohol (IPA) on a lint-free towel. For stubborn residue, step up to 90% IPA.
- Use an adhesion promoter on the plastic where tape will sit, especially on textured areas. Let it flash per the product instructions.
- Replace the tape if the old tape looks glossy, dusty, or deformed. Apply fresh automotive-grade tape in thin strips (avoid thick stacks that create uneven height).
- Press firmly using a roller or your thumb wrapped in microfiber. Hold pressure on corners for 30?60 seconds.
- Heat-set lightly with a hair dryer (not a heat gun on high). Warm the area, then press again.
- Let it cure 24?72 hours before heavy use. Avoid interior cleaners and don?t park in direct sun on day one if possible.
Step-by-Step Fix: Vinyl Wrap Edge Lift
- Identify tension points (sharp radii, concave corners, tight vent openings).
- Warm the vinyl and gently lift it back to a stable area where the adhesive still looks clean.
- Re-stretch correctly: use less tension and ?feed? material into corners. Over-stretching is a guarantee the edge will crawl back.
- Post-heat the finished edge (typically 180?200�F / 82?93�C depending on film brand). This resets the vinyl memory and prevents shrink-back.
- Seal edges in hidden or high-wear zones with edge-sealer tape or a compatible edge sealant if the film manufacturer recommends it.
Real-World Example
A common scenario: a pre-cut wood grain overlay around the climate controls starts peeling at the bottom corners. The owner cleaned with an all-purpose interior cleaner first, then installed in a 50�F garage. The cleaner left residue and the tape never achieved full bond. The fix: remove and retape those corners with 3M automotive tape plus adhesion promoter, installed warm with firm pressure.
Problem: Misalignment, Gaps, or ?It Looked Straight? Until the Sun Hit It?
Wood grain patterns can exaggerate alignment issues. A piece may be technically centered but still look crooked because the grain direction conflicts with surrounding lines.
Likely Causes
- Installed without a dry-fit reference
- Rushed placement before adhesive made contact
- Dash curvature pulling the piece as pressure is applied
- Pattern direction not matched side-to-side
Step-by-Step Fix: Correcting Placement
- Assess how long it?s been installed. Within the first hour, some pieces can be repositioned carefully. After 24 hours, plan on removal and new tape.
- Use painter?s tape as guide lines to create a ?box? or centerline reference on the surrounding trim.
- Dry-fit the piece and mark alignment points with small tape tabs.
- For tape-backed kits, peel a small section of backing first, tack the piece in place, confirm alignment, then pull the rest of the backing while pressing outward.
- For vinyl wraps, lift and re-lay while warm; avoid stretching to ?force? alignment.
Problem: Bubbles, Blisters, or Raised Spots Under the Accent
Bubbles can appear immediately or days later. They?re usually trapped air, solvent outgassing, or uneven contact caused by texture.
Likely Causes
- Applying over a dusty or textured surface without proper prep
- Using too thick of tape in some zones and thin in others
- Vinyl installed without squeegeeing from center outward
- Heat exposure after install causing air expansion
Step-by-Step Fix
- Small air bubbles in vinyl: warm the area and use a felt-edged squeegee to work air toward the nearest edge.
- Persistent small bubble: use a fine pin to make a tiny vent hole, then warm and press flat. Keep the hole minimal so it disappears in the grain pattern.
- Blisters under rigid overlays: remove the piece, clean thoroughly, and reapply with even tape distribution and stronger pressure.
- Textured plastic issue: consider lightly scuffing (only if the trim is being permanently covered), then clean, use adhesion promoter, and retape.
Problem: Creaking, Rattles, or Loose-Feeling Trim After Installation
If your interior starts creaking after adding wood grain accents, it?s usually not the accent itself?it?s the reinstalled trim clips, added thickness, or contact points changing where parts rub.
Likely Causes
- Trim clips not fully seated or partially broken
- Overlay thickness causing interference (especially near switches or tight bezels)
- Missing felt tape or factory anti-rattle padding
- Wiring harnesses not clipped back into place
Step-by-Step Fix: Noise Hunt
- Recreate the sound on a rough road at low speed. Lightly press on suspect panels to isolate the area.
- Check clearances around buttons, shifter bezels, and vent louvers. Look for rubbing marks.
- Remove the panel carefully and inspect clips. Replace damaged clips rather than forcing them.
- Add anti-rattle material (thin felt tape) where plastic meets plastic.
- Reinstall using even pressure until clips snap uniformly. Don?t slam one side in first if the panel is wide.
Problem: Color Mismatch, Too Glossy/Too Matte, or ?Fake Wood? Look
Even high-quality wood grain dash kits can look off if the sheen clashes with your interior. A glossy walnut next to matte black plastics can feel aftermarket, especially in bright sun.
What You Can Do
- Match sheen, not just color: OEM interiors often use satin or semi-gloss, not mirror gloss.
- Choose grain scale wisely: large, high-contrast grain patterns can overpower small cabins.
- Balance the cabin: if you add wood to the dash, consider smaller matching accents on the doors or console to make it look intentional.
Options to Adjust Finish
- For painted/hydro-dipped trim: a professional re-clear in satin or semi-gloss is the cleanest solution.
- For rigid overlays: some can be lightly scuffed and clear-coated, but test first?certain plastics and printed finishes don?t like solvents.
- For vinyl: swap to a different series (matte wood, satin wood, open-pore look) rather than trying to coat it.
Product Recommendations: What Actually Helps (And What?s Overhyped)
These categories are where quality matters most for long-term durability.
Adhesives and Prep
- Automotive acrylic foam tape (OEM-style): Best for rigid overlays; holds up to heat cycles better than generic tape.
- Adhesion promoter wipes: Ideal for textured plastics and tight edges; especially helpful around vents and curves.
- Isopropyl alcohol (70?90%): The staple for removing oils and light residue. Use a clean microfiber and change sides often.
Tools Worth Buying
- Plastic trim tools: Prevents marring during removal and repositioning.
- Small hand roller: Makes a big difference pressing tape evenly without finger fatigue.
- Infrared thermometer: Helpful for vinyl post-heating so you don?t guess and overcook a panel.
Dash Kit vs. Vinyl Wrap: Quick Comparison
- Dash kit overlays: Faster install, consistent pattern, great for beginners. Downsides: thickness can interfere; edges can lift if prep is weak.
- Vinyl wrap: Thin, more OEM-like transitions, flexible around contours. Downsides: requires heat skill; shrink-back if not post-heated.
- Hydro-dip/paint: Most permanent and can look factory when done well. Downsides: time, cost, and prep complexity.
Common Mistakes to Avoid (These Cause Most Failures)
- Cleaning with a shiny interior dressing beforehand (silicone is the enemy of adhesives).
- Skipping a dry-fit and relying on ?eyeballing? alignment.
- Installing in cold temps and assuming it?ll bond later when it warms up.
- Touching adhesive with fingers while positioning pieces.
- Overheating vinyl until the pattern distorts or the film becomes brittle.
- Forgetting cure time and immediately scrubbing the area with cleaner or microfiber pressure.
- Stacking tape to fill gaps instead of addressing the fit?this creates uneven pressure points and future rattles.
FAQ: Wood Grain Accent Troubleshooting
How long should I wait before using interior cleaners on new wood grain trim?
Give it at least 48?72 hours if you used tape-backed overlays or vinyl, especially in cooler weather. If you must wipe, use a dry microfiber lightly?no sprays or heavy rubbing during the cure window.
Can I fix lifting edges without removing the whole piece?
Sometimes, yes?if the lift is minor and the tape/adhesive underneath is still clean. If dirt has gotten under the edge or the tape looks ?dead,? you?ll get better results removing and replacing the tape in that area.
What?s the best way to remove a wood grain dash kit without damaging the OEM trim?
Warm the panel, lift with a plastic tool, and use an adhesive remover that?s safe for automotive plastics. Go slowly and avoid metal tools. Expect to replace tape afterward.
Why does my vinyl wood wrap keep shrinking back on corners?
Usually from over-stretching and not post-heating. Vinyl has memory; post-heating resets it. Reduce tension at corners, add relief where appropriate, and post-heat to the film maker?s recommended temperature.
My wood grain looks different at night than during the day?normal?
Yes. Interior lighting temperature and windshield tint can shift how browns and reds read. If it bothers you, aim for lower-contrast grains and satin finishes, which tend to look more consistent across lighting conditions.
Should I use super glue or epoxy to stop edges from lifting?
Avoid it for most interiors. It can fog finishes, turn brittle with heat cycles, and make future removal destructive. Automotive tape plus adhesion promoter is usually the correct fix. For permanent builds, a professional-grade trim adhesive is safer than household super glue.
Next Steps: Get a Clean, OEM-Style Result That Lasts
If your wood grain accent addition isn?t behaving, don?t keep pressing the same peeling corner and hoping it?ll ?learn.? Start with the basics: warm install conditions, proper cleaning, even pressure, and the right adhesive system for your material. When you correct the root cause?contamination, temperature, tension, or interference?the fix tends to stay fixed.
- Pick one problem area (like a lifting corner) and repair it fully rather than chasing multiple small issues.
- Upgrade the bonding method where needed: fresh automotive tape, adhesion promoter, and consistent pressure.
- Recheck fitment around switches, vents, and tight bezels to prevent rattles and future lifting.
Want to keep refining your interior? Explore more installation tips, trim comparisons, and cabin upgrade guides on carinteriormix.com.